Using the Pocket Progmammer with ATMega328p
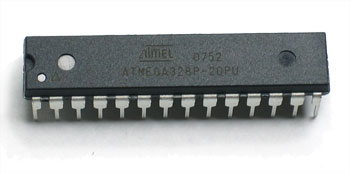 I thought that I would have to learn AVR code in order to program my ATMega328P micro. Then I got to reading on the arduino.cc website and found out that by changing a setting in the arduino software’s preferences.txt file I could simply use the arduino software and arduino code for programming my chip.
Parts I used:
Follow the instructions in this tutorial to get your breadboard set up.
Make sure to put a 16MHz crystal in your circuit if you are using the ATMega328P with the arduino bootloader (between pins 9 and 10 on the ATMega). I spent a while trying to figure out that I just needed to put in a crystal because the micro had been preconfigured to use a 16MHz crystal instead of the internal oscillator.
K ready go.
- Make sure your arduino software isn’t open.
- Change the preferences file. Located here: C:\Documents and Settings<USER>\Application Data\Arduino\preferences.txt
- Change this line:
upload.using=bootloader - To look like this:
upload.using=usbtinyisp - Change “usbtinyisp” to match whatever programmer you are using. A list of values for this are in programmers.txt under your arduino install location:
...arduino-0022\hardware\arduino\programmers.txtRead more about this here.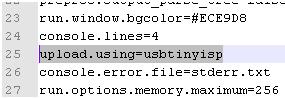
- Save preferences.txt
- Now write some arduino code. I started with blinking an LED to make sure I had it right. Then I uploaded some code to turn a servo. Use this awesome page to figure out how the pins from your arduino translate to pins on the ATMega.
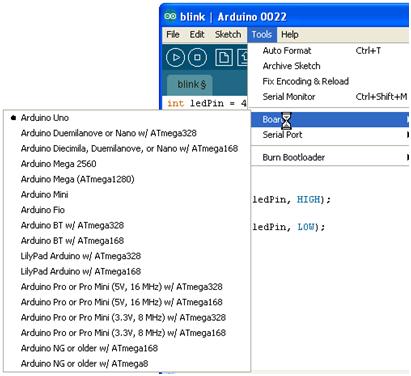
- When you have your code ready to upload, use the Tools>Board menu to select a board with the same microcontroller that you’re using. I selected the Arduino Uno because I know it uses the ATMega328.
- Now all you have to do is press the upload button in the arduino software and your code will upload to the ATMega and run.
Here’s a video of the action. I’ve hooked up a servo to my breadboard (arduino pin 9 = ATMega pin 15), and uploaded some code to turn it clockwise and counterclockwise.