Oven Light Buzzer
Watching the preheat light on your oven and waiting for it to go off is sooo much work (yes I am extremely lazy). A lot of modern ovens have a built in buzzer to notify you when they are preheated. If that were the case with my oven, and it was just broken, I could just hit something like PartSelect for a replacement. However, my oven is ancient, and it does not have one of these fancy buzzers built in. Easy fix though with a simple circuit containing some transistors, a potentiometer, a photoresistor, and, you guessed it, a buzzer! look at it (would you look at it).
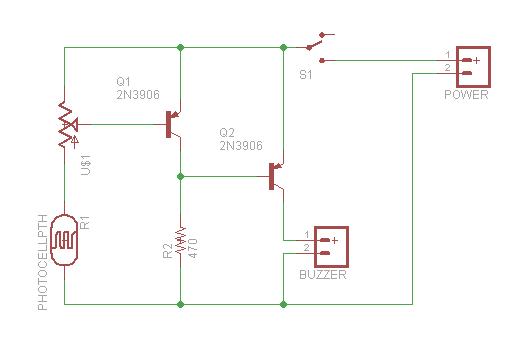
In short, the photoresistor keeps Q1 turned on until the oven light goes off. Once the light goes off, Q2 is switched on which turns on the buzzer. The potentiometer is the adjust for the circuit so that if you have some really odd circumstances then it’ll still work (although you could probably just use a plain ol’ resistor).
After some home style etching and a little bit of rigging, I got it soldered up and strapped to my oven. To use: turn on your oven, flip the switch on the sensor board, and wait till the thing buzzes. Your oven will be preheated and you will waste a lot less energy (real nice if you have a propane oven) than if you’re just manually walking over and looking to see if the preheat light has gone off.
some pictures:
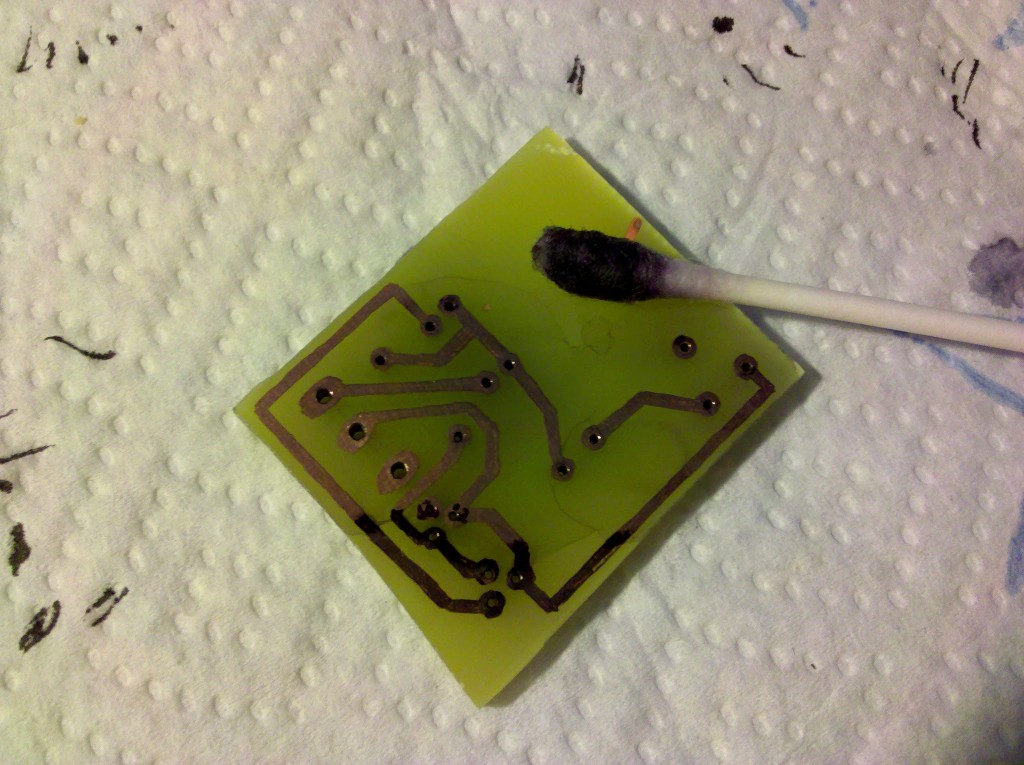
Sorry for the lack of more pictures of the process. This is part way through the process of taking off the etch resist with acetone (see home style etching).
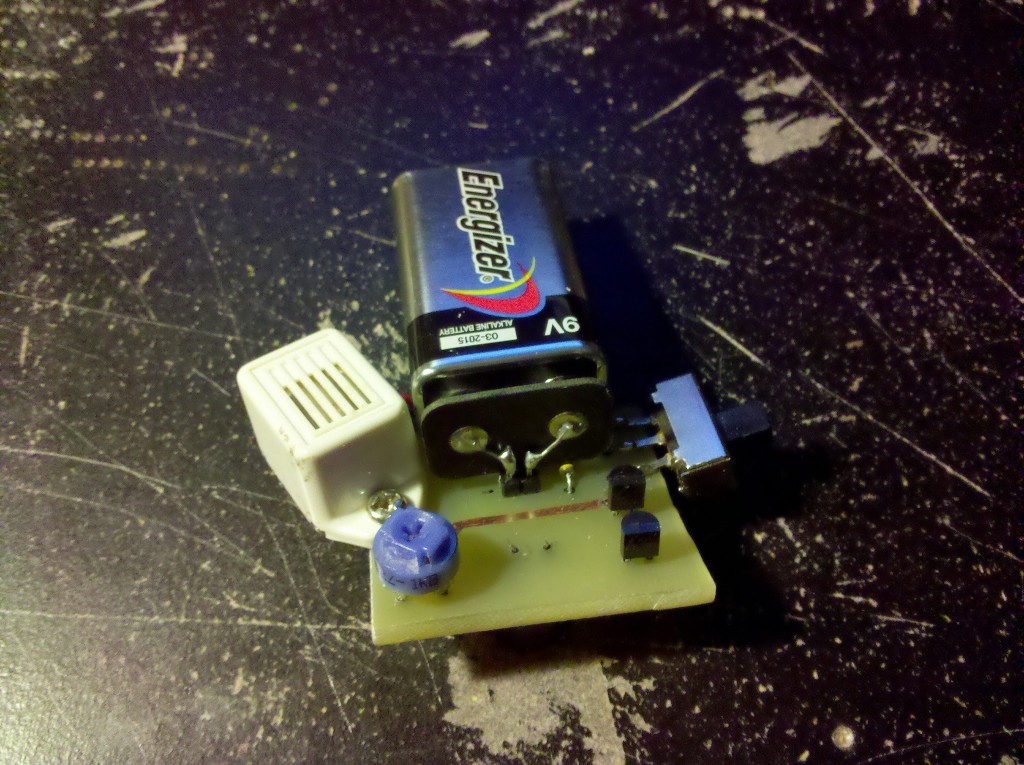
This is the front side of the completed board. I had to hack on a 9 volt plug which is actually the top of another disassembled 9 volt.
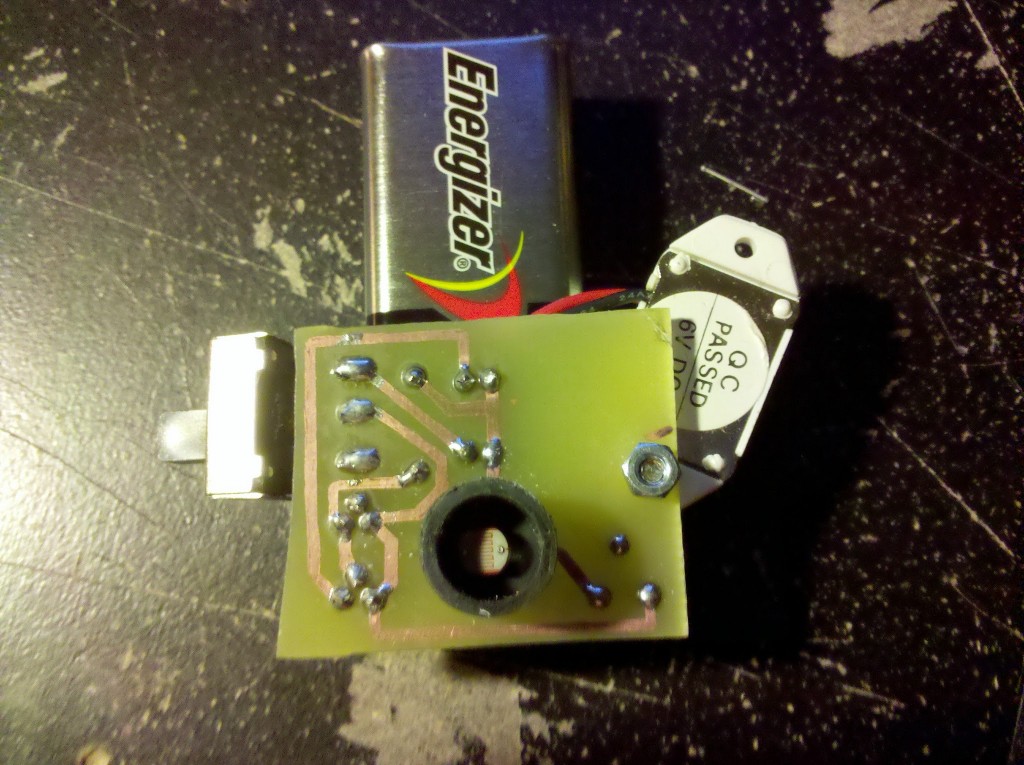
The back side of the sensor board. The photoresistor is inside of a rubber holder for a microphone. I’m not really sure what I got this out of, but it worked perfectly for isolating the sensor from outside sources of light.
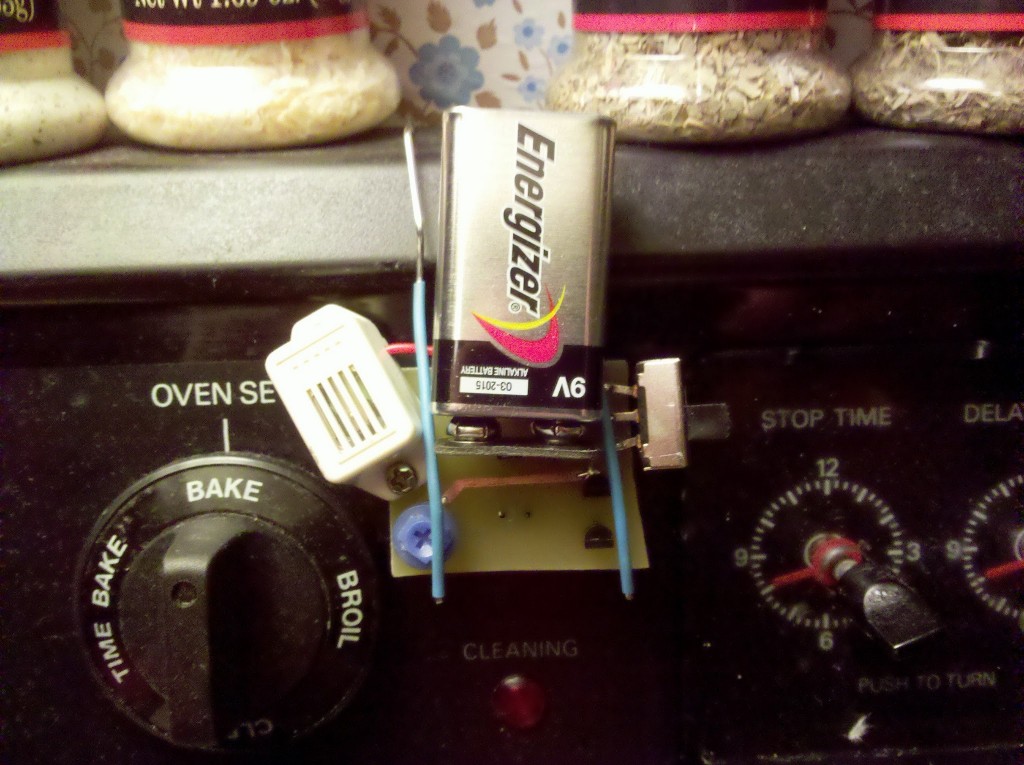
And last but not least, this is the sensor in position on my oven. I used a couple of bent up large paper clips to hold the thing in place. The blue stuff is heat shrink tubing around the paper clips which insulates them where they could potentially cause a short. There is a “Preheat” light under sensor board that is similar to the “Cleaning” light that you can see.
Turns out I waited a really long time to post about this project (wow! almost a year already). This thing has been incredibly helpful, especially if you’re super distractible like me.